In this series of blog posts, we’re looking at how to set up a simple web app in node.
In the previous installment we looked at serving angle brackets, both static files and server-side templates.
In this post we’ll look at persisting data to a database. The node way.
A Basic Todo List
A simple todo list is a great way to explore persisting data. Let’s create a new view to allow users to add/delete a list of todo items.
We’ll call this view todos.html:
<div class="container">

  <h1>Todo List</h1>

  <ul>
    { {#todos} }
      <li><strong>{ {value} }</strong> <a href="/delete/{ {key} }">delete</a></li>
    { {/todos} }
  </ul>

  <form method="POST" class="form-inline">
    <div class="form-group">
      <label>New todo</label>
      <input name="todo" type="text" class="form-control">
    </div>
    <button type="submit" class="btn btn-default">Add</button>
  </form>

</div>
(please note I’ve had to put a space between my curly braces which shouldn’t be there)
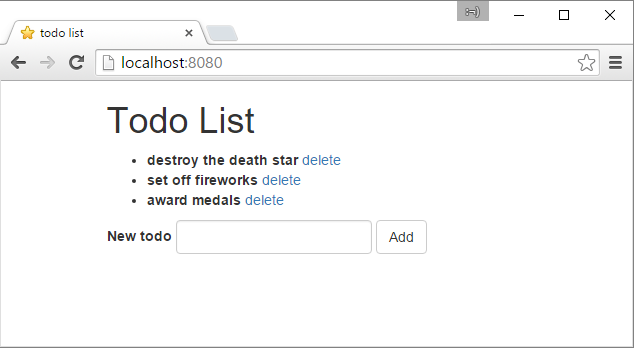
Let’s have a quick run through of what’s in this view:
- It writes out a list of todos.
- Each todo has a ‘delete’ link.
- It displays a form, allowing you to add new todo items.
Parsing form posts
This page will post forms to us. Express doesn’t handle HTTP bodies any more (it used to!), you need to install some middleware to parse the HTTP body and convert it into an object (req.body). Let’s use the body-parser module. Install it like this:
> npm install body-parser --saveIn your server.js file you can now include the module, and plug it in:
var bodyParser = require('body-parser');
app.use(bodyParser.urlencoded({extended:false}));
You can add the app.use line directly after the app.use for serving static files, which we added last time.
Databases
Node support lots of databases, everything from SQL Server to Mongo DB, but the node way of doing databases is a bit different. Instead of connecting to an external database system, we’ll run the database inside the node server!
LevelDB is a key-value store developed by Google, it’s a C++ library which you can include within your application to provide basic database features. The node community has fantastic support for level, with a rich ecosystem of modules around level.
There are command line and graphical tools to allow you to view you data. There are libraries which build upon level’s interface, to provide more complex data structures. But interestingly, there are modules which replace the guts of the level module with alternative forms of persistence, such as Redis, or my own, which connects to Azure’s Table Storage.
The advantage with going with level is that it presents a ‘lowest common denominator’ interface. This allows you to change your mind later about exactly where you data is stored, without you having to refactor your code.
Let’s install it. This command will download the level, and build the C++ code:
> npm install level --saveIf you have any trouble installing the module, make sure you have the prerequisites installed. This generally work well for me on Ubuntu, on Windows it can be more of a challenge :¬(
Level will use the local filesystem to save the data. We’ll call the database ‘todos’, and use it in our server.js like this:
var level = require('level');
var db = level('todos');
Note: You can create multiple databases within the same application, but it’s generally better to have less databases, and create different ranges of keys to store the data.
Guid keys
There’s one more thing we’ll need. In order to create the keys in the database we’ll need to create unique strings. A simple way of doing this is just to create guids. Of course, there’s a module (well there’s several) for that:
> npm install node-uuid --saveWhich we can use like this:
var guid = require('node-uuid').v4;Working with the database
Let’s listen to HTTP posts, and insert records into the database. Call the method put on the database, passing in your key and value as well as a callback to fire when the record is saved. Once saved, we’ll redirect back to the home page:
app.post('/', function(req, res){
  // create a todo

  db.put(guid(), req.body.todo, function(err){
    if (err) console.log(err);
    res.redirect('/');
  });
});
To delete todos, we’ll listen for gets on this path /delete/{key} and delete the key from the database accordingly. We’ll also redirect back to the homepage once complete:
app.get('/delete/:key', function(req,res){
  // delete a todo

  db.del(req.params.key, function(err){
    if (err) console.log(err);
    res.redirect('/');
  });
});
On the main page we need to read all the data out of the database, and send it to the new todos.html view. Level will allow us to stream ranges of keys from the database. In this case, we’ll stream everything out (listening to the on event), add it to an array, and once finished render the view (listening out for the end event):
app.get('/', function(req, res){
  res.locals.title = 'todo list';
  res.locals.todos = [];

  // read all todos from the database

  var stream = db.createReadStream();
  stream.on('data', function(data) {
    res.locals.todos.push(data);
  });
  stream.on('end', function() {
    res.render('todos');
  });

});
Simple.
Let’s pull it all together, and see what our server.js file looks like:
// load the path package

var path = require('path');
// load the express package

var express = require('express');
var bodyParser = require('body-parser');
// create an express application

var app = express();
//create the database

var level = require('level');
var db = level('todo');

var guid = require('node-uuid').v4;

// set up hogan for rendering views

app.engine('html', require('hogan-express'));
app.set('views', path.join(__dirname, 'views'));
app.set('view engine', 'html');
app.set('layout', 'layout');
// register middleware to serve static pages

app.use(express.static(path.join(__dirname, 'public')));
// register middleware to parse form encoded body

app.use(bodyParser.urlencoded({extended:false}));

app.get('/', function(req, res){
  res.locals.title = 'todo list';
  res.locals.todos = [];

  // read all todos from the database

  var stream = db.createReadStream();
  stream.on('data', function(data) {
    res.locals.todos.push(data);
  });
  stream.on('end', function() {
    res.render('todos');
  });

});

app.post('/', function(req, res){
  // create a todo

  db.put(guid(), req.body.todo, function(err){
    if (err) console.log(err);
    res.redirect('/');
  });
});

app.get('/delete/:key', function(req,res){
  // delete a todo

  db.del(req.params.key, function(err){
    if (err) console.log(err);
    res.redirect('/');
  });
});

// start listening on port 8080

app.listen(8080);
There are a few lines of code there, but this is a web server and a database, all in one JavaScript file :¬)
Next we’ll shift our focus over to the browser, and convert our todo list into a single page application.
UPDATE
If you’re experiencing problems with LevelDB (Paul Grenyer reported that his database wasn’t persisting on Heroku) I suggest using Redis to persist the data.
Install a couple of modules:
> npm install levelup redisdown --saveThen create the db object like this instead:
var levelup = require('levelup')
var redisdown = require('redisdown')
var db = levelup('todos', { db: redisdown, host: 'localhost', port: 6379 })
Now you’re running on Redis instead :¬)